- October 10, 2022
- Posted by: Andrew
- Category: Uncategorized

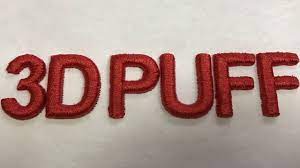
Perhaps you’re unfamiliar with the term “3D puff embroidery” if you’re new to the embroidery or digitizing world. You may wow your friends, customers, and even yourself with the impressive results of 3D puff embroidery, often known as 3D or puff embroidery.
3D puff embroidery involves embroidering on or around 3D puff to raise your stitches, giving your pattern or writing a 3D aspect and feel while still remaining flat on the garment. Embroidering with 3D puff can be a fun way to unleash your imagination!
In this type of embroidery, the design or typography is raised off the background. This sort of embroidery is common on baseball caps, sports caps, and similar headwear. There’s no need to let the prospect of 3D puff embroidery throw you. To get the hang of digitizing and correct puff practice.
You can do this type of digitizing on all types of fabric and get the new look you want for your item.
Methods of Digitization:
If you need to sew a design or text over the 3D puff, use satin (column) threads instead of fill stitches.
To prevent the 3D puff from showing through, use a higher density than usual (0.10 in iPunch, 1.0 to 2.0 in Stitch & Sew).
3D puff should be used in a color that is as close as feasible to the thread color.
Remove unnecessary detail and smooth off sharp edges wherever you can, especially where the satin stitches end in a point.
If you want to avoid gaps between individual satin panels, overlap their ends. Otherwise, a “bulge” will form in the 3D puff at the site of any opening.
To aid in cutting/perforating the sides, use an edge-walk or 2-line style underlay with short stitch lengths (l.5 mm or less).
– Finish the beginning and finish of each satin section by stitching a row of small (1mm) running threads or a row of dense satin stitching perpendicular to the main satin stitching that runs across that part.
Method of Sewing:
Remove the pattern area’s 3D puff, then tape the remaining 3D puff to the inside of the hat. The first stitching of the design should be sufficient to bind the 3D puff to the fabric or garment; a more secure hold is not required.
3D puff can be stacked (and held together with a spray adhesive like 505) to achieve a greater height and more dramatic appearance.
Using ballpoint needles for stitching is preferable because they create a hole that is (slightly) larger than those made by sharp-tipped needles, facilitating a more precise “cut” through the 3D puff.
As you progress through the 3D puff, loosen the tension slightly to give the thread a bit more give and feed.
You can increase the height by stacking two 3D puff sheets.
Since many of your competitors probably won’t provide this form of embroidery or won’t take the time to learn it, you’ll have a leg up on the competition and be able to attract more clients and orders as a result.
